Quick Keto Ham & Cheese Roll-Ups: The Perfect 10-Minute Low-Carb Snack
Ever stare into your fridge wondering how to make something satisfying without blowing your carb count for the day?
These keto ham & cheese roll-ups are your answer.
I’ve been making these beauties for years, and they never fail to hit the spot when I need something quick, filling, and ridiculously easy.
KEY INFO
- Prep time: 10-15 minutes
- Cook time: 0-15 minutes (depending on variation)
- Total time: 10-30 minutes
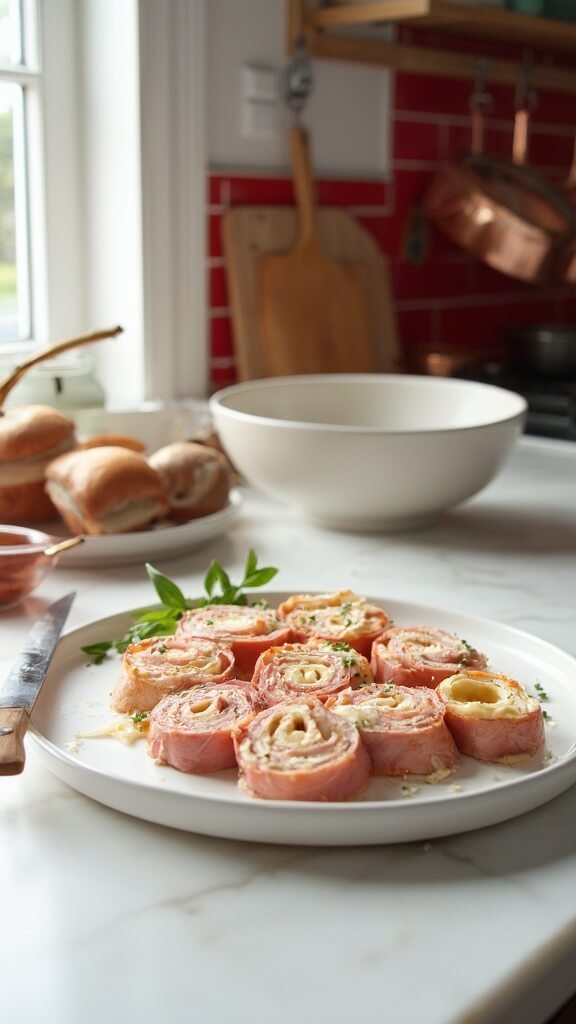
- Servings: 6 roll-ups
- Difficulty level: Beginner-friendly
- Dietary tags: Keto, low-carb, gluten-free
Nutrition per serving: 1-4g net carbs | 14-28g protein | 14-29g fat | 150-390 calories
EQUIPMENT NEEDED
Essential tools:
- Cutting board
- Sharp knife
- Small mixing bowl
- Spoon or spatula for spreading
Nice-to-have alternatives:
- Non-stick skillet (for hot versions)
- Toothpicks (keeps everything tidy)
- Wax paper (helps with rolling)
INGREDIENTS
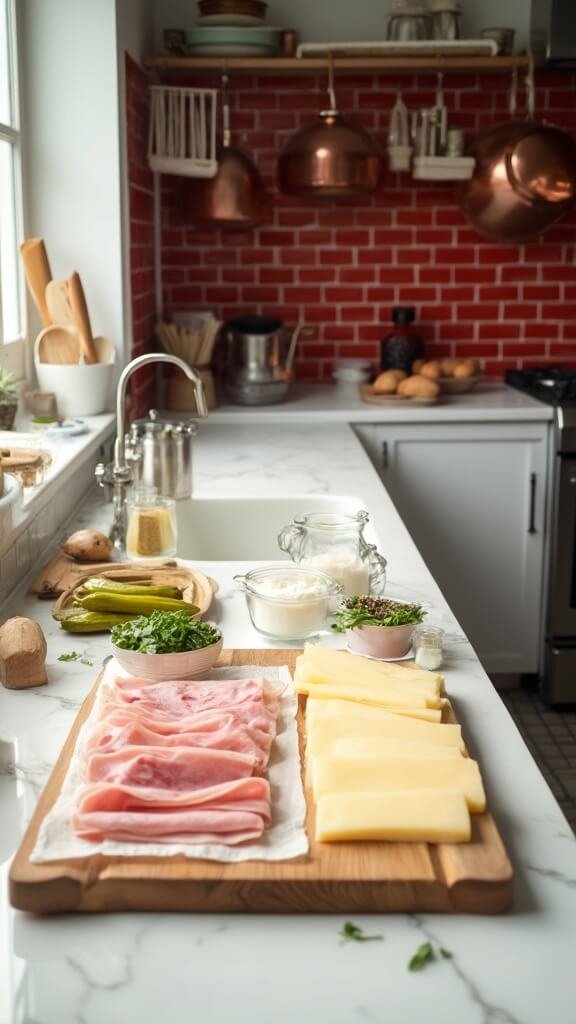
Main components:
- 6 slices deli ham (3-4 oz) – or turkey, roast beef
- 6 slices cheese (Swiss, cheddar, or mozzarella) – or cheese sticks for easy rolling
- 4 oz cream cheese, softened – or ricotta, goat cheese
Flavor boosters:
- 1 tsp garlic powder
- 1 tsp everything bagel seasoning – or ranch seasoning
- Salt and pepper to taste
Optional add-ins:
- 2-3 pickle spears, sliced thin
- 1-2 jalapeños, minced (pat dry first!)
- Fresh chives, chopped
METHOD
Basic Cold Roll-Ups (My Go-To Method)
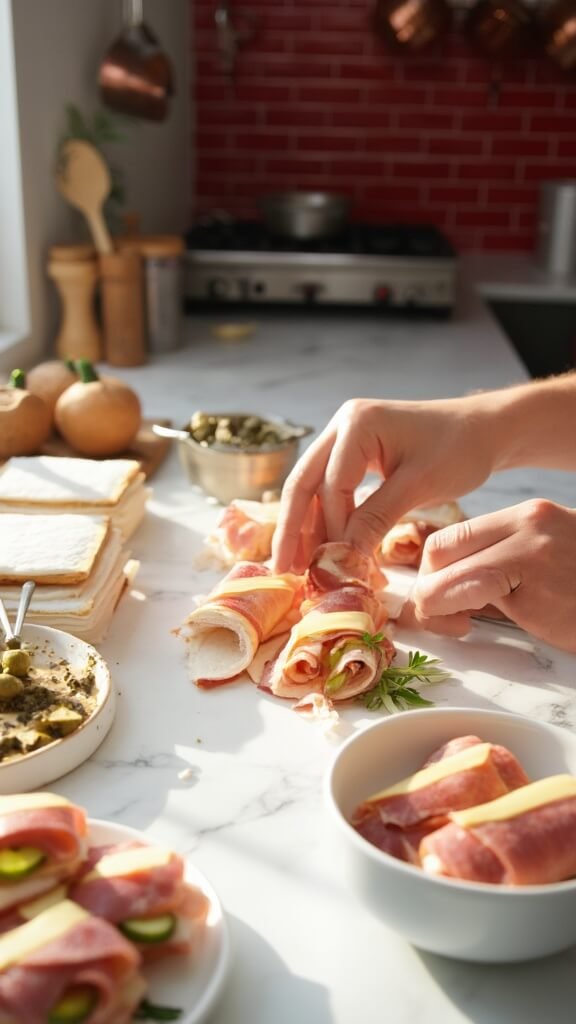
- Prep your workspace. Lay out ham slices on a clean cutting board.
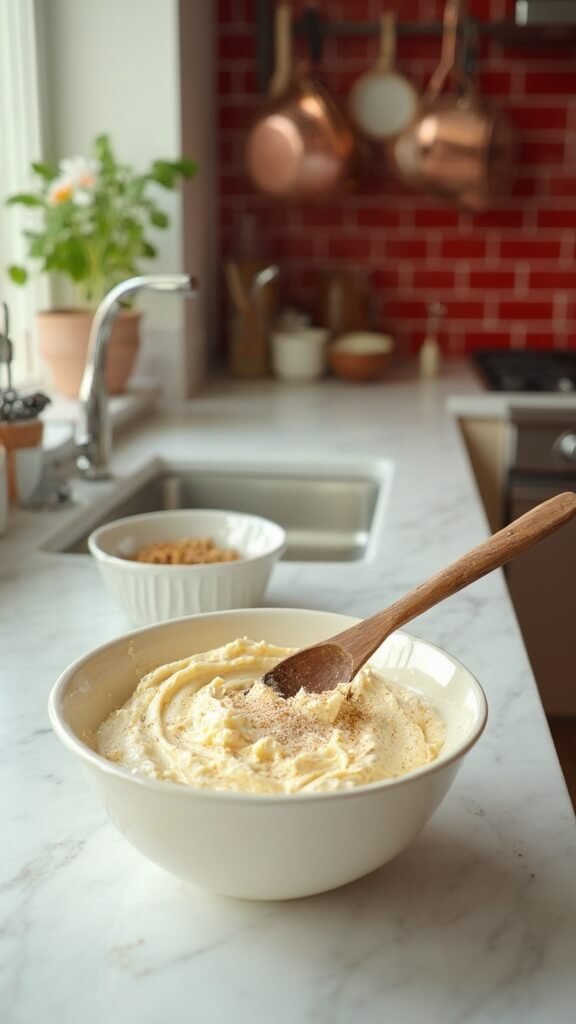
- Make the spread. Mix softened cream cheese with garlic powder and seasoning in a small bowl. Taste and adjust – don’t be shy with the flavor!
- Spread evenly. Use about 1 tablespoon of cream cheese mixture per ham slice. Spread it right to the edges.
- Add your cheese. Place one slice of cheese on each ham slice, leaving a small border.
- Roll tightly. Start from one end and roll as tight as possible without squeezing out the filling. The tighter, the better for slicing.
- Chill for clean slices. Wrap in plastic wrap and refrigerate for 20-30 minutes if you want perfect pinwheel slices.
- Slice and serve. Cut into 1-inch rounds with a sharp knife. Wipe the knife between cuts for the cleanest look.

Hot Pan-Fried Version (When You Want Something Warm)
- Wrap cheese sticks. Use mozzarella sticks and wrap each one with a slice of ham.
- Heat your pan. Medium heat with a bit of butter or olive oil.
- Fry until golden. 2-3 minutes per side until ham is crispy and cheese starts to melt.
- Serve immediately. These are best hot and gooey!
CRUCIAL TIPS
For perfect roll-ups every time:
- Pat wet ingredients dry – pickles and jalapeños can make things soggy
- Room temperature cream cheese spreads easier – microwave for 15 seconds if you forgot to take it out
- Don’t overfill – you’ll end up with a messy disaster
- Sharp knife is everything – dull knives squash your beautiful rolls
Storage and scaling:
- Keep refrigerated for up to 4 days in an airtight container
- Double or triple the recipe easily – perfect for parties
- Don’t freeze these – the texture gets weird
Common Mistakes I See People Make
- Using too much filling (less is more, trust me)
- Not seasoning the cream cheese enough (it should taste great on its own)
- Trying to slice immediately (patience pays off with cleaner cuts)
- Using watery vegetables without patting them dry first
My Favorite Variations
- “Minnesota Sushi” Style: Add a whole pickle spear to each roll for that classic deli crunch.
- Jalapeño Popper Rolls: Mix minced jalapeños right into the cream cheese for a spicy kick.
- Hot Baked Version: Mix everything together, shape on a baking sheet, and bake at 375°F for 15-20 minutes until golden.
- Turkey Club Style: Use turkey instead of ham and add a tiny bit of crispy bacon bits.
These roll-ups have saved my bacon (pun intended) countless times when I needed something fast and satisfying.
They’re perfect for meal prep, party platters, or when you’re staring at your fridge at 3 PM wondering what qualifies as an acceptable snack.
The best part?
Once you master the basic technique, you can stuff these with whatever sounds good.
I’ve made versions with roasted red peppers, sun-dried tomatoes, and even leftover rotisserie chicken.
Make a batch this week and thank me later!